
Introduction
I have to admit, making homemade bread always felt a little intimidating to me. But after my second attempt at making bread in the air fryer, I was honestly so delighted with how it turned out!
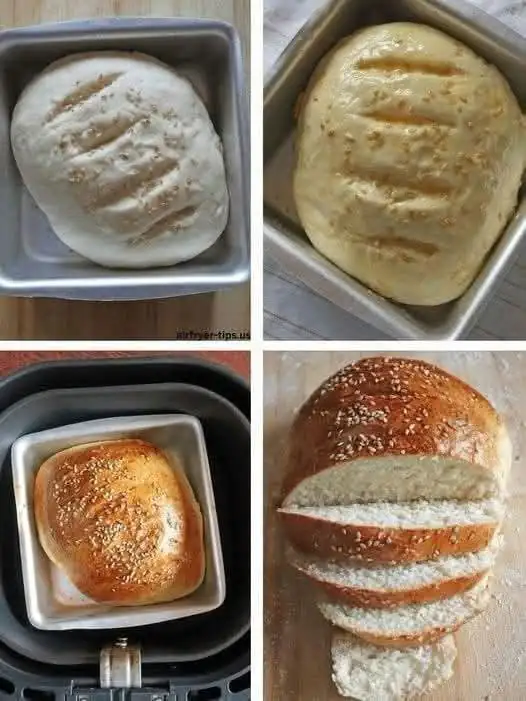
The outside became beautifully golden and lightly crisp, while the inside was soft, fluffy, and delicious. And the best part? You don’t need a large oven or any complicated equipment.
I usually love recipes that don’t require a lot of fuss, and this one definitely fits the bill. Once you get the dough mixed and give it enough time to rise, the air fryer does most of the work.
If you’ve never tried making bread in your air fryer before, this is a great recipe to start with.
Ingredients
For the Bread Dough
- 2 cups all-purpose flour
- 1 teaspoon instant yeast
- 1 tablespoon sugar
- ¾ teaspoon salt
- ¾ cup warm water
- 1 tablespoon olive oil or melted butter
- 1 tablespoon milk, optional
For the Top
- 1 teaspoon milk or beaten egg, optional
- 1 tablespoon sesame seeds, optional
Step-by-Step Method
1. Activate the Yeast
If you’re using active dry yeast, combine the warm water, sugar, and yeast in a small bowl. Let it sit for about 5–10 minutes, until slightly foamy.
If you’re using instant yeast, you can mix it directly with the flour.
Don’t use very hot water, because excessive heat can damage the yeast.
2. Make the Dough
In a large bowl, combine the flour and salt.
Add the yeast mixture and olive oil or melted butter. Mix everything together until a rough dough forms.
If the dough feels too dry, add a teaspoon of water at a time. If it’s very sticky, sprinkle in a little more flour.
3. Knead
Transfer the dough to a lightly floured surface and knead for about 8–10 minutes, until it becomes smooth and elastic.
Honestly, this is one of my favorite parts because you can actually feel the dough changing as you work with it.
4. Let the Dough Rise
Place the dough in a lightly greased bowl and cover it with a clean kitchen towel or plastic wrap.
Let it rise in a warm place for approximately 1–1½ hours, or until it has roughly doubled in size.
The exact time can vary depending on how warm your kitchen is.
5. Shape the Bread
Once the dough has risen, gently press out the excess air.
Shape it into a smooth round or oval loaf that will fit comfortably inside your air fryer.
Place it into a small greased baking pan or air-fryer-safe loaf pan.
6. Give It a Second Rise
Cover the shaped dough and let it rest for another 20–30 minutes.
This extra rise helps give the finished bread that soft, fluffy texture.
7. Add the Topping
Brush the top lightly with milk or beaten egg if desired.
Sprinkle with sesame seeds for a pretty golden finish.
You can also make a few shallow cuts across the top with a sharp knife.
8. Air Fry
Preheat your air fryer to 320°F (160°C) for about 3–5 minutes.
Place the pan inside and air fry for approximately 20–25 minutes, depending on the size and shape of your loaf and your particular air fryer.
The bread should be golden brown on top and sound hollow when gently tapped.
If the top browns too quickly, loosely cover it with foil during the remaining cooking time.
9. Cool Before Slicing
Remove the bread from the air fryer and let it cool on a wire rack for at least 20–30 minutes.
I know it’s tempting to slice it immediately, but letting it cool helps the inside finish setting properly.
Then slice and enjoy!
Cooking Tips for Perfect Air Fryer Bread
- Check your dough consistency: It should be soft and slightly tacky but not excessively sticky.
- Don’t rush the rising time: Properly risen dough gives you much lighter bread.
- Avoid overheating the yeast: Water should feel warm, not hot.
- Don’t overcrowd the air fryer: The loaf needs room for hot air to circulate.
- Watch the crust: Air fryers can brown bread quickly, so keep an eye on it toward the end.
- Use a suitable pan: Make sure your baking pan fits comfortably inside your air fryer.
- Let it cool: Cutting into very hot bread can make the interior seem gummy.
- Air fryers vary: Cooking times can differ, so start checking a few minutes before the suggested finishing time.
Serving Suggestions
This homemade bread is delicious while still slightly warm.
I usually serve it with:
- Butter and honey
- Jam or fruit preserves
- Scrambled or fried eggs
- Cream cheese
- Peanut butter
- Soup or stew
- Cheese and sliced vegetables
- Grilled chicken or sandwiches
You can also toast leftover slices the next morning. They become wonderfully crisp around the edges while staying soft in the middle.
Approximate Nutrition Information
Per serving, assuming 8 servings:
- Calories: 150–170
- Protein: 4–5 g
- Carbohydrates: 28–31 g
- Fat: 2–4 g
- Fiber: 1–2 g
- Sugar: 1–2 g
- Sodium: 220–250 mg
Nutrition is an estimate and will vary depending on the exact ingredients and portion size.
Conclusion
This homemade air fryer bread was such a fun recipe to try, especially because this was my second attempt and the result turned out so much better than I expected.
The crust was beautifully golden, and the inside was soft, fluffy, and delicious. Honestly, there’s something really satisfying about slicing into a loaf of bread that you made yourself.
If you’ve been putting off making homemade bread because you think it’s difficult, give this air fryer version a try. With a little patience while the dough rises, you can have a lovely homemade loaf without turning on a large oven.
5 Frequently Asked Questions
1. Can I make bread in any air fryer?
Yes, as long as your air fryer has enough space for the pan or loaf and allows adequate air circulation. Basket-style and oven-style air fryers can both work.
2. Why didn’t my bread rise?
The yeast may have been inactive, the water may have been too hot or too cold, or the dough may have been left somewhere too cool. Give the dough plenty of time to rise, especially in a cold kitchen.
3. Can I use whole wheat flour?
Yes, but whole wheat flour produces a denser loaf. For a softer result, try replacing only part of the all-purpose flour with whole wheat flour rather than using 100% whole wheat.
4. How do I know when the bread is done?
The crust should be golden brown, and the loaf should sound hollow when tapped. If you have a food thermometer, the center should generally reach around 190–200°F (88–93°C) for a lean yeast bread.
5. How should I store homemade bread?
Once completely cooled, store the bread in an airtight container or bread bag at room temperature for about 2–3 days. For longer storage, slice and freeze it in a sealed freezer bag, then thaw or toast individual slices as needed.