Description
Stop buying store-bought bread! This easy homemade bread recipe requires no kneading, no eggs, and no butter. Soft, fluffy, budget-friendly bread made with simple pantry ingredients.
I Don’t Buy Bread Anymore! No Kneading, No Eggs, No Butter – The Easiest and Cheapest Bread Recipe
Introduction
Honestly, I never thought making bread at home could be this simple. For years, I bought bread from the grocery store every week because I assumed homemade bread would be complicated, time-consuming, and expensive. Then I discovered this incredibly easy no-knead bread recipe, and everything changed.
Now, I usually make a couple of loaves every week. It costs just a fraction of what store-bought bread costs, and the taste is so much better. The best part? There are no eggs, no butter, and absolutely no kneading required. Just mix, let it rise, and bake.
If you’re looking for a foolproof homemade bread recipe that’s perfect for beginners, this is the one. Once you try it, you may never want to buy bread again!
Why You’ll Love This Recipe
- No kneading required
- No eggs or butter needed
- Budget-friendly ingredients
- Soft inside with a lightly crisp crust
- Perfect for sandwiches, toast, and everyday meals
- Beginner-friendly recipe
- Great for meal prep and freezing
Ingredients
Makes 2 medium loaves
- 4 cups (500g) all-purpose flour
- 1½ teaspoons salt
- 1 tablespoon sugar
- 2 teaspoons instant dry yeast
- 1¾ cups (420ml) warm water
- 2 tablespoons vegetable oil
Step-by-Step Method
Step 1: Mix the Dry Ingredients
In a large mixing bowl, combine:
- Flour
- Salt
- Sugar
- Instant yeast
Mix everything together until evenly distributed.
Step 2: Add the Wet Ingredients
Pour the warm water and vegetable oil into the bowl.
Using a wooden spoon or spatula, mix until a sticky dough forms. The dough will look rough and shaggy, which is completely normal.
Do not knead.
Step 3: First Rise
Cover the bowl with plastic wrap, a lid, or a clean kitchen towel.
Place it in a warm spot and let it rise for about 1 hour, or until doubled in size.
Step 4: Shape the Dough
Lightly flour your work surface.
Turn the dough out and divide it into two equal portions.
Gently shape each portion into a loaf. There’s no need to knead the dough. Simply fold and shape it into a rough loaf form.
Place the dough into two greased loaf pans.
Step 5: Second Rise
Cover the loaf pans with a towel.
Allow the dough to rise again for about 30–40 minutes until puffy and nearly doubled.
Step 6: Bake
Preheat your oven to 375°F (190°C).
Bake the loaves for 30–35 minutes, or until golden brown on top and hollow-sounding when tapped.
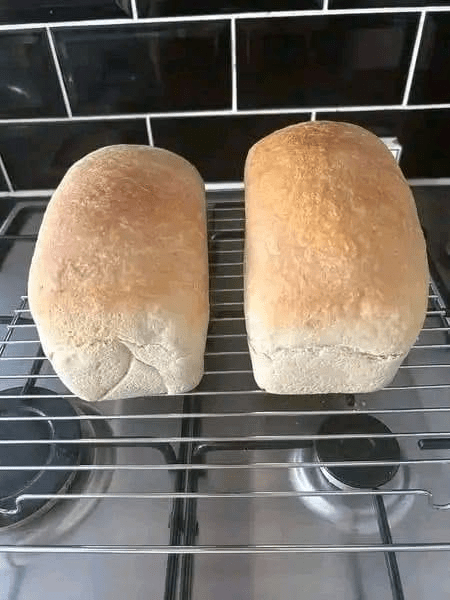
Step 7: Cool
Remove the bread from the pans and place on a wire rack.
Allow the loaves to cool for at least 20 minutes before slicing.
Cooking Tips for Perfect Bread
Use Warm Water
The water should feel warm but not hot. Around 100–110°F (38–43°C) is ideal. Water that’s too hot can kill the yeast.
Don’t Add Too Much Flour
The dough should be slightly sticky. Adding too much flour can make the bread dense.
Let It Rise Properly
I usually place the bowl inside my turned-off oven with the light on. This creates the perfect warm environment for rising.
Check for Doneness
Tap the bottom of the loaf. If it sounds hollow, it’s fully baked.
Store Correctly
Keep bread in an airtight container or bread bag for up to 3 days at room temperature.
Serving Suggestions
This homemade bread is incredibly versatile.
Serve it with:
- Butter and jam for breakfast
- Homemade soup
- Grilled cheese sandwiches
- Peanut butter and jelly
- Avocado toast
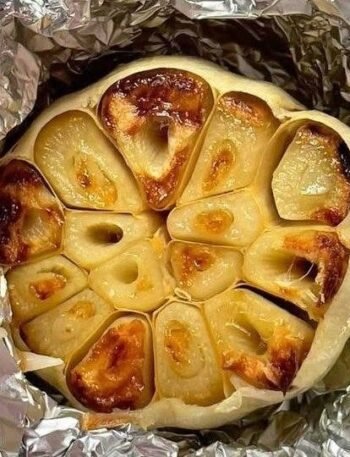
- Garlic bread
- French toast
- Sandwiches for lunch
I honestly love it slightly toasted with a little honey drizzled on top.
Approximate Nutrition Information
Per serving (1 slice, based on 16 slices total)
| Nutrient | Amount |
|---|---|
| Calories | 120 |
| Carbohydrates | 24g |
| Protein | 3g |
| Fat | 2g |
| Saturated Fat | 0.3g |
| Fiber | 1g |
| Sugar | 1g |
| Sodium | 180mg |
Nutrition values are estimates and may vary depending on ingredients used.
Frequently Asked Questions
1. Can I make this bread without a loaf pan?
Yes. You can shape the dough into round or oval loaves and bake them directly on a lined baking sheet.
2. Can I use active dry yeast instead of instant yeast?
Absolutely. Dissolve the active dry yeast in the warm water with the sugar and let it sit for 5–10 minutes before mixing.
3. How do I store homemade bread?
Store it in an airtight container or bread bag at room temperature for up to 3 days. For longer storage, freeze it.
4. Can I freeze this bread?
Yes. Wrap the cooled loaf tightly in plastic wrap and place it in a freezer-safe bag. Freeze for up to 3 months.
5. Why is my bread dense?
Dense bread is usually caused by expired yeast, insufficient rising time, or adding too much flour.
Conclusion
This no-knead homemade bread recipe has become a staple in my kitchen. It’s simple, affordable, and uses ingredients I almost always have on hand. The fact that it requires no eggs, no butter, and no kneading makes it one of the easiest bread recipes you’ll ever make.
I usually bake two loaves at a time because they disappear so quickly. Whether you’re trying to save money, avoid store-bought bread, or simply enjoy the satisfaction of baking from scratch, this recipe is a fantastic place to start.
If you enjoy simple homemade recipes like this, be sure to save, share, and leave a comment—it really helps me keep sharing more easy recipes. Thank you for your support!