
Introduction
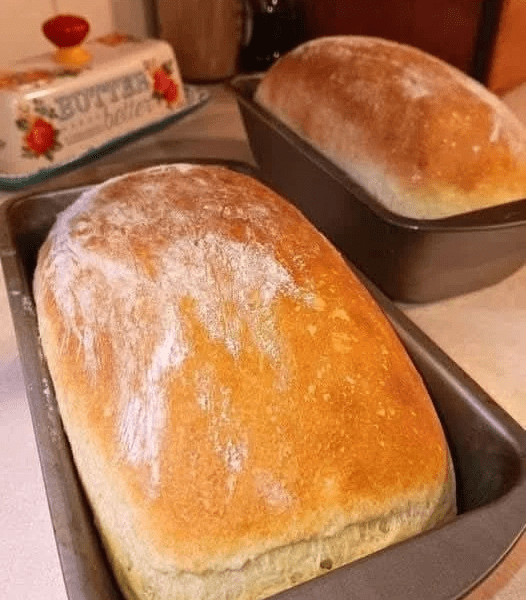
Making bread at home can feel intimidating at first, but using an air fryer simplifies the process significantly. Unlike a traditional oven, an air fryer provides a compact, controlled environment that heats quickly and evenly. This makes it perfect for small batches of bread with a soft interior and a beautifully golden crust.
This recipe yields a soft, slightly sweet loaf with a tender crumb—perfect for sandwiches, toast, or simply enjoying with butter. The air fryer gives the bread a crisp exterior without drying it out, making it a great alternative if you don’t want to heat up your entire oven.
Ingredients
- 2 cups all-purpose flour
- 1 tablespoon sugar
- 1 teaspoon salt
- 1 teaspoon instant yeast (or active dry yeast)
- 3/4 cup warm water (not hot, about 100–110°F / 38–43°C)
- 1 tablespoon olive oil (or melted butter)
Equipment
- Air fryer
- Mixing bowl
- Measuring cups and spoons
- Wooden spoon or spatula
- Loaf pan or small baking pan that fits inside your air fryer
- Clean kitchen towel or plastic wrap
Step-by-Step Instructions
Step 1: Activate the Yeast
If you’re using instant yeast, you can skip activation and mix it directly with the dry ingredients. However, if you’re using active dry yeast:
- In a small bowl, combine warm water and sugar.
- Sprinkle the yeast over the top.
- Let it sit for about 5–10 minutes until it becomes foamy.
This step ensures your yeast is alive and active. If it doesn’t foam, your yeast may be expired or the water may have been too hot or too cold.
Step 2: Mix the Dough
- In a large mixing bowl, combine flour and salt.
- Add the yeast mixture (or instant yeast plus water if skipping activation).
- Add olive oil.
- Stir everything together until a rough dough forms.
At this stage, the dough may look shaggy and uneven. That’s perfectly normal.
Step 3: Kneading the Dough
Turn the dough out onto a lightly floured surface and knead for about 8–10 minutes.
To knead:
- Push the dough away from you using the heel of your hand
- Fold it back over itself
- Rotate slightly and repeat
You’re looking for a dough that becomes smooth, elastic, and slightly tacky but not sticky. If it sticks too much, add a small amount of flour, one tablespoon at a time.
Kneading develops gluten, which gives bread its structure and chewiness.
Step 4: First Rise (Proofing)
- Place the kneaded dough in a lightly greased bowl.
- Cover it with a towel or plastic wrap.
- Let it rise in a warm place for about 1 hour, or until it doubles in size.
A warm environment is crucial. If your kitchen is cold, you can:
- Place the bowl inside a turned-off oven with the light on
- Set it near a warm appliance
Step 5: Shape the Dough
After the dough has risen:
- Punch it down gently to release excess air.
- Turn it onto a floured surface.
- Shape it into a loaf by flattening it slightly, then rolling it tightly into a log shape.
Place the shaped dough into a greased loaf pan that fits inside your air fryer.
Step 6: Second Rise
Cover the dough again and let it rise for another 30–40 minutes. It should puff up and fill the pan more fully.
This second rise improves the texture and gives the bread a lighter structure.
Step 7: Preheat the Air Fryer
Preheat your air fryer to 320°F (160°C) for about 3–5 minutes.
Preheating ensures even cooking from the start.
Step 8: Bake the Bread
- Place the loaf pan carefully into the air fryer basket.
- Cook at 320°F (160°C) for 15–20 minutes.
- Check the top—if it’s browning too quickly, cover loosely with foil.
- Continue cooking for another 10–15 minutes.
Total cooking time is typically 25–30 minutes.
To check if it’s done:
- Tap the top; it should sound hollow
- Or insert a thermometer—the internal temperature should be about 190°F (88°C)
Step 9: Cooling
Remove the bread from the air fryer and let it cool in the pan for about 5–10 minutes.
Then transfer it to a wire rack to cool completely before slicing.
Cooling is essential—cutting too early can make the bread gummy.
Tips for Success
1. Don’t Overheat the Water
Water that is too hot can kill yeast. Always aim for warm, not hot.
2. Measure Flour Correctly
Too much flour can make your bread dense. Spoon flour into your measuring cup and level it off instead of scooping directly.
3. Adjust for Your Air Fryer
Different air fryers vary in power. You may need to slightly adjust time or temperature.
4. Use Foil if Needed
If the top browns too quickly, tent it with foil to prevent burning while the inside finishes cooking.
Variations
1. Herb Bread
Add 1 teaspoon of dried herbs like rosemary, thyme, or oregano to the dough.
2. Garlic Bread
Mix in minced garlic and a bit of melted butter for a savory twist.
3. Whole Wheat Version
Replace half of the all-purpose flour with whole wheat flour for a nuttier flavor and denser texture.
4. Sweet Bread
Increase sugar to 2–3 tablespoons and add cinnamon or raisins.
Storage
- Store at room temperature in an airtight container for up to 3 days
- Refrigerate for up to 1 week (though it may dry out slightly)
- Freeze slices for up to 2 months
To reheat, toast slices or warm them briefly in the air fryer.
Troubleshooting
Bread Didn’t Rise
- Yeast may be expired
- Environment may have been too cold
Bread is Dense
- Not kneaded enough
- Too much flour added
Crust Too Hard
- Cooked too long
- Temperature too high
Why Use an Air Fryer for Bread?
An air fryer is excellent for small-batch baking because:
- It heats quickly
- Uses less energy than a full oven
- Produces a crisp crust
- Is convenient for beginners
It’s especially useful if you want fresh bread without committing to a large loaf or long baking time.
Final Thoughts
Making bread in an air fryer is a rewarding and approachable way to get started with homemade baking. The process teaches fundamental techniques like kneading, proofing, and shaping, while the air fryer simplifies baking.