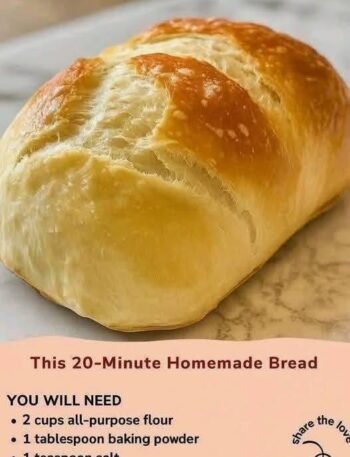
Honestly, once I started making this bread at home, I stopped buying bread so often. There’s something really satisfying about pulling a warm, golden loaf out of the oven and knowing it cost just a few basic ingredients.
And the best part? There’s no kneading, no eggs, and no butter.
I usually make this when I want fresh bread but don’t want to spend half the day in the kitchen. The dough takes only a few minutes to mix, then I let time do most of the work.
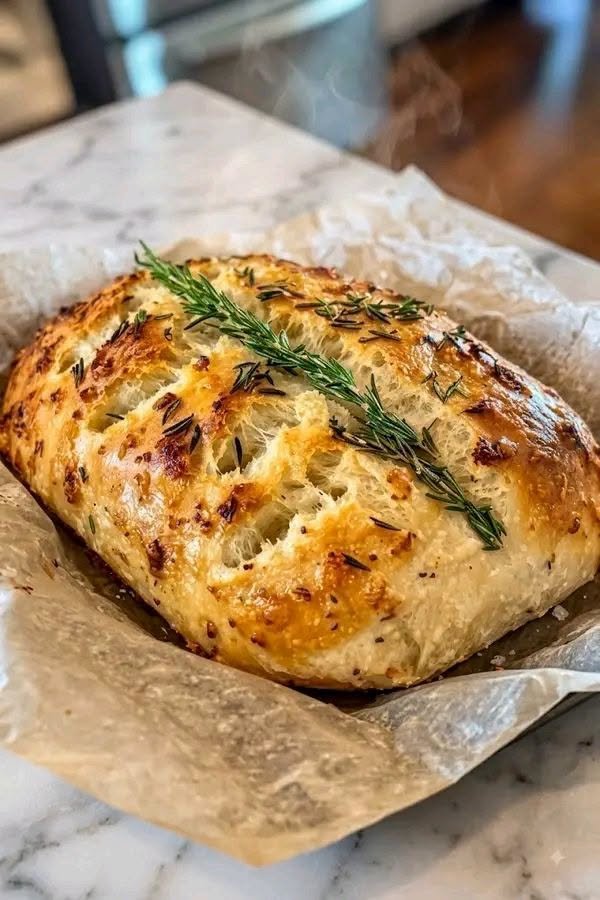
The result is a rustic loaf with a beautifully crisp, golden crust and a soft, airy center. I love adding rosemary and garlic for extra flavor, but you can keep it completely plain if you prefer.
If you’re new to bread baking, this is honestly one of the easiest homemade bread recipes to start with.
Why You’ll Love This Homemade Bread
-
No kneading required
-
No eggs or butter
-
Uses inexpensive, everyday ingredients
-
Very little hands-on preparation
-
Soft and fluffy inside
-
Crispy, golden crust
-
Easy to customize with herbs, garlic, or seeds
-
Great for sandwiches, toast, dipping, and serving with dinner
Ingredients
For the Bread
-
3 cups (375 g) all-purpose flour
-
1 ½ teaspoons salt
-
1 teaspoon sugar
-
2 teaspoons instant yeast
-
1 ½ cups (360 ml) warm water
-
1 tablespoon olive oil
Optional Rosemary-Garlic Topping
-
1–2 tablespoons olive oil
-
1–2 cloves garlic, finely minced
-
1 tablespoon fresh rosemary, chopped
-
A little extra coarse salt
A quick note: The olive oil isn’t essential to making the bread, but I usually add a little because it gives the loaf a lovely texture and helps the crust brown beautifully.
How to Make Easy No-Knead Homemade Bread
1. Mix the Dry Ingredients
Add the flour, salt, sugar, and instant yeast to a large mixing bowl.
Give everything a quick stir so the yeast and salt are distributed throughout the flour.
2. Add the Water
Pour in the warm water and olive oil.
Using a wooden spoon or spatula, mix everything together until you have a sticky, shaggy dough.
Don’t worry about making it smooth. This is a no-knead bread, so resist the temptation to start working the dough.
If the dough looks slightly wet and sticky, that’s exactly what you want.
3. Let the Dough Rise
Cover the bowl with plastic wrap, a lid, or a clean kitchen towel.
Leave it somewhere warm for about 1½ to 2 hours, or until the dough has noticeably doubled in size.
I usually just leave mine on the kitchen counter and get on with everything else. That’s one of the reasons I love this recipe so much.
For even more flavor
If you have time, you can let the dough rise slowly in the refrigerator for 8–18 hours. The longer fermentation gives the bread a deeper, more developed flavor.
4. Shape the Dough
Once the dough has risen, lightly flour your work surface.
Gently scrape the dough out of the bowl.
Fold the edges toward the center a few times and shape it into a rough round or oval loaf.
There’s no need to knead it. Just handle it gently.
5. Prepare for Baking
Place the dough on a piece of parchment paper.
If you’re making the rosemary version, drizzle a little olive oil over the top and gently spread it around.
Sprinkle with chopped garlic and rosemary. You can also add a small pinch of coarse salt.
I like to make a couple of shallow cuts across the top with a sharp knife. This gives the bread somewhere to expand while baking.
6. Bake Until Golden
Preheat your oven to 220°C (425°F).
For an especially crisp crust, place a sturdy baking tray, Dutch oven, or oven-safe skillet in the oven while it preheats.
Carefully place the dough into the hot baking vessel.
Bake for approximately 30–35 minutes, or until the loaf is deeply golden brown and sounds hollow when tapped underneath.
If the top is browning too quickly, loosely cover it with foil during the final part of baking.
7. Let It Cool
This is probably the hardest part.
I know it’s tempting to cut into the bread immediately, especially when the whole kitchen smells incredible. But let it cool for at least 20–30 minutes before slicing.
The inside continues to set as it cools, so cutting too early can make the crumb seem gummy.
Cooking Tips for Perfect Homemade Bread
Don’t add too much flour
This is probably the most important tip.
The dough should be sticky and soft, not dry and firm. Adding lots of extra flour can make your bread heavy instead of light and fluffy.
Use warm, not hot, water
The water should feel comfortably warm rather than hot. Water that’s excessively hot can damage the yeast.
Give the dough enough time
Don’t judge the rise strictly by the clock. If your kitchen is cool, the dough may need longer.
Look for a dough that has expanded significantly and looks airy and bubbly.
Don’t knead it
Seriously!
The whole point of this recipe is that the long resting time develops the dough for you. A few gentle folds while shaping are all you need.
Want a crispier crust?
Bake the bread in a preheated Dutch oven or other covered oven-safe baking vessel. Remove the lid for the final 10–15 minutes so the crust can become deeply golden.
For extra flavor
Fresh rosemary and garlic are my favorite combination, but you can also add:
-
Dried Italian herbs
-
Chopped olives
-
Sun-dried tomatoes
-
Sesame seeds
-
Black or white sesame
-
Dried chili flakes
-
Grated Parmesan
-
Roasted garlic
How to Store Homemade Bread
Once completely cool, keep the bread in a paper bag or loosely wrapped in a clean kitchen towel for about 2 days at room temperature.
For longer storage, slice the loaf and freeze the slices in an airtight freezer bag.
Then you can take out exactly what you need and toast it straight from frozen.
Serving Suggestions
Warm homemade bread goes with practically everything.
I especially like serving this loaf with:
-
Soup or stew
-
Pasta
-
Roasted vegetables
-
Eggs for breakfast
-
Cheese and olives
-
Grilled chicken
-
Salads
-
Dips and hummus
-
A simple drizzle of olive oil
And honestly, sometimes I don’t serve it with anything at all. A warm slice with a little olive oil and salt is enough.
Approximate Nutrition Information
Per serving, assuming 10 servings per loaf:
-
Calories: ~170 kcal
-
Carbohydrates: ~31 g
-
Protein: ~5 g
-
Fat: ~3 g
-
Fiber: ~1 g
-
Sodium: ~350 mg
Nutrition is an estimate and will vary depending on the exact flour, oil, salt, and serving size used.
Frequently Asked Questions
1. Can I make this bread without olive oil?
Yes. Olive oil isn’t essential. You can leave it out and make the bread with flour, water, yeast, salt, and sugar. The texture may be slightly different, but it will still work.
2. Why is my no-knead bread sticky?
A sticky dough is normal for this recipe. No-knead breads generally contain more water than traditional kneaded doughs.
If it’s extremely wet and impossible to handle, add flour one tablespoon at a time rather than adding a large amount all at once.
3. Can I use whole wheat flour?
Yes, but I recommend replacing only part of the all-purpose flour at first. Try using about 1 cup whole wheat flour + 2 cups all-purpose flour.
Using 100% whole wheat flour will produce a denser, heavier loaf and may require adjustments to the liquid.
4. Can I prepare the dough the night before?
Absolutely. In fact, this is one of my favorite ways to make it.
Mix the dough, cover it, and refrigerate it overnight. The slow fermentation can give the bread a wonderful flavor.
Take it out the next day, let it sit at room temperature for a while, shape it gently, and bake.
5. How do I know when the bread is fully baked?
The loaf should be nicely browned and should sound hollow when you tap the bottom.
If you have a kitchen thermometer, the center should generally reach around 95–100°C (203–212°F).
Final Thoughts
If you’ve always thought homemade bread was complicated, I really hope you try this one.
There are no fancy ingredients, no complicated techniques, and definitely no hours of kneading. I usually mix everything together, let the dough sit, shape it, and let the oven do the rest.
The rosemary and garlic topping makes it feel a little special, but the basic loaf is just as delicious on its own.
And that’s what I love most about this recipe: simple ingredients, very little work, and fresh homemade bread that comes out golden, crispy, and soft in the middle.
Once you get comfortable with this basic recipe, you can start playing around with herbs, seeds, garlic, cheese, or different flours.
No bread machine