
Stop spending money at the bakery! Discover the absolute easiest, cheapest no-knead bread recipe. No eggs, no butter, and minimal effort for the perfect homemade loaf.
Introduction: Why I Stopped Buying Bread
Honestly, I used to think baking bread was only for professionals or people with hours of free time. I’d walk down the grocery store aisle, grab a $5 loaf filled with preservatives I couldn’t pronounce, and call it a day. But a few months ago, I got completely fed up with how fast store-bought bread goes stale—not to mention the cost adding up!
I started experimenting, and after a few messy kitchen disasters, I finally found the holy grail of homemade baking. I can confidently say: I don’t buy bread anymore! This is the easiest and cheapest bread recipe you will ever make. It requires absolutely zero kneading, no eggs, and no butter. It is basically foolproof.
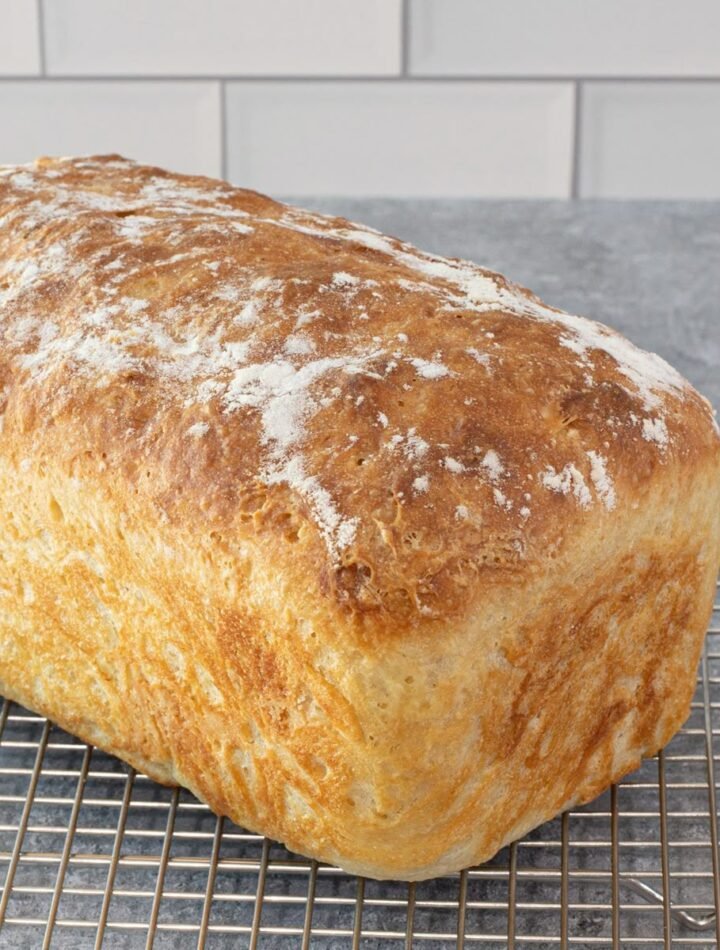
You might think a recipe this simple would yield a dense, boring brick, but you can actually achieve a gorgeous, fluffy bake. For inspiration on how beautiful a homemade loaf can look when proofed and baked in a standard pan, just take a peek at image_cb5efd.jpg!
Grab a bowl and a spoon, because we are about to make your kitchen smell amazing.
Ingredients List
You only need a few absolute pantry staples for this magic to happen. The original viral recipe calls for just the liquids and yeast to start, and I’ve added the standard amounts of flour and salt you’ll need to pull it all together.
-
Water: 200 ml (0.85 cup) – Make sure it’s warm, not hot!
-
Sugar: 25g (2 tbsp) – This feeds the yeast and helps the crust brown.
-
Active Dry Yeast: 3g (1 tsp)
-
All-Purpose Flour or Bread Flour: 300g (about 2.5 cups)
-
Salt: 5g (1 tsp) – Never skip the salt, or your bread will taste totally flat.
-
Olive oil: Just a splash to grease your bowl and pan.
Step-by-Step Method
I usually make this on a lazy Sunday afternoon, but it’s so fast to prep you could do it almost any day.
1. Activate the Yeast In a large mixing bowl, combine your warm water, sugar, and yeast. Give it a gentle stir and let it sit for about 5 to 10 minutes. Honestly, if it gets all bubbly and frothy on top, you’re good to go.
2. Mix the Dough Pour your flour and salt directly into the yeast mixture. Grab a sturdy wooden spoon or a spatula and just mix it together until a shaggy, sticky dough forms and there are no dry flour pockets left. That’s it! No stand mixer, no sweaty kneading on the counter.
3. The First Rise (Proofing) Drizzle a tiny bit of olive oil over the dough, cover the bowl with a damp kitchen towel or plastic wrap, and leave it in a warm spot in your kitchen for about 1.5 to 2 hours. It should double in size.
4. Shape It Up Once the dough has puffed up, gently deflate it with your spatula. Transfer it to a greased loaf pan (an 8×4 or 9×5 inch pan works great). If you want to get fancy and mimic that beautiful professional style, you can divide the dough into three pieces, gently roll them into balls, and place them side-by-side in the pan.
5. The Second Rise Cover the pan again and let it rest for another 30 to 45 minutes until the dough puffs up to the rim of your pan.
6. Bake to Perfection While the dough is doing its final rise, preheat your oven to 375°F (190°C). Bake the bread for 30 to 35 minutes until the top is a beautiful golden brown and the loaf sounds slightly hollow when you tap it.
7. Cool Before Slicing Do not cut into it hot! I know the temptation is real, but let it cool on a wire rack for at least an hour so the crumb can set.
My Top Cooking Tips
-
Temperature matters: If your water is too hot, it will kill the yeast. If it’s too cold, the yeast will take forever to wake up. Aim for “bathwater warm.”
-
Don’t overthink the mix: This is a “wet” dough. It’s supposed to look a bit sticky and messy in the bowl. Resist the urge to add heaps of extra flour!
-
Create a warm environment: If your house is freezing, turn your oven on for exactly 60 seconds, turn it off, and then put your covered bowl in there to rise.
Serving Suggestions
-
Morning Toast: Slice it thick, toast it until crunchy, and slather it with jam or a drizzle of honey.
-
Sandwich Upgrade: This bread makes the most incredible grilled cheese sandwiches. The crust gets super crispy while the inside stays soft.
-
Soup Season: Tear off big chunks and dunk them into a hearty bowl of tomato soup or beef stew.
Nutrition Information (Approximate per slice, yields 10 slices)
-
Calories: 120 kcal
-
Carbohydrates: 24g
-
Protein: 3g
-
Fat: 0.5g
-
Sodium: 190mg
-
Sugar: 2.5g
Conclusion
Baking your own bread doesn’t have to be a whole-day, flour-covered ordeal. With just some water, sugar, yeast, and flour, you can save money and eat so much better. Give this no-knead, dairy-free, egg-free loaf a try this weekend, and I promise you’ll be saying, “I don’t buy bread anymore!” right alongside me.
Frequently Asked Questions (FAQs)
1. Can I use instant yeast instead of active dry yeast? Yes, absolutely! If you use instant yeast, you don’t even need to wait the 10 minutes for it to froth. Just mix it directly with your warm water, sugar, flour, and salt all at once.
2. Can I make this with whole wheat flour? You can, but I highly recommend doing a 50/50 split (half all-purpose flour, half whole wheat flour). 100% whole wheat will make the bread quite dense since we aren’t kneading it to build gluten.
3. Why did my bread collapse in the oven? This usually happens if the dough was “over-proofed” (left to rise for way too long). The yeast runs out of energy, and the structure collapses. Try to stick to the recommended rise times!
4. How long does this homemade bread last? Since it has no artificial preservatives, it will stay fresh in an airtight container or bread bag at room temperature for about 3 to 4 days.
5. Can I freeze the baked loaf? Yes! Honestly, freezing is the best way to save homemade bread. I usually slice the whole loaf once it’s completely cooled, put the slices in a zip-top freezer bag, and just pop individual slices straight into the toaster whenever I want them.