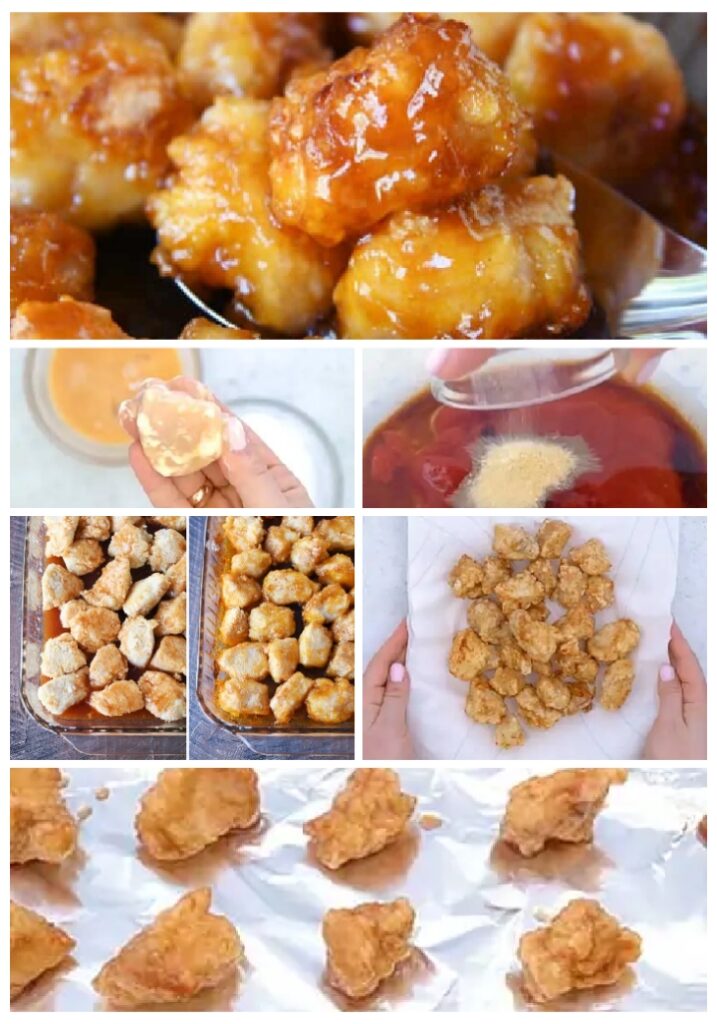
Skip the Chinese takeout and make baked sweet and sour chicken at home with a delicious sweet and sour sauce poured over tender chicken with a crispy breading.
Easy baked sweet and sour chicken served on a bed of rice.
Perfect for a comforting dinner at home or even a low-key date night, this baked sweet and sour chicken is a great dish for any occasion.
Packed with a ton of flavor and easy to make, this is sure to be a go-to dish when you’re craving delicious food. Plus, it tastes just like Chinese takeout, but gives you complete control over the flavor (should it be sweeter? More sour?) and texture (level of crunchiness is yours to command).
HOW TO KNOW IF YOUR OIL IS HOT ENOUGH FOR FRYING
Whenever you’re frying chicken, it’s important that your oil is hot enough because if it’s not the chicken may absorb the oil and become too greasy. The good news is that there are two easy ways to check if your oil is hot enough before frying:
Use a thermometer to measure the temperature (it should be between 350 and 375 degrees F.)
Stick the end of a wooden spoon in the oil. If the oil starts bubbling around the wood, then the oil is ready.
Crispy baked sweet and sour chicken garnished with chives.
While the chicken is fried first, this is just to get a light and crispy coat of breading on the outside. It also helps cook the inside of the chicken (in most cases, the chicken will be almost entirely opaque after frying).
So after the chicken is fried and coated in sauce, this recipe does say to bake the chicken – because this will help bake the flavor of the sauce into the breading. There’s a subtle difference between being coated in sauce and flavored with sauce and baking the chicken does that for this recipe. Baking also helps the sauce “come together” by infusing and reducing, making it cling to the chicken more.
However, you can skip the baking step if you’d like, so long as you make sure the chicken is fully cooked through (no pink and fully opaque) from frying alone.
HOW LONG IS SWEET AND SOUR CHICKEN GOOD FOR?
Once prepared, baked sweet and sour chicken can be stored in the refrigerator in a sealed container for up to four days.
CAN YOU FREEZE SWEET AND SOUR CHICKEN?
Yes, you totally can!
To freeze, allow the chicken to cool completely and then transfer to a freezer bag, removing as much air as possible before sealing. Sweet and sour chicken can be frozen for up to three months.
When ready to eat, let the chicken thaw in the refrigerator overnight, then bake for 25-30 minutes at 325 degrees F or until heated through.
WHAT TO SERVE WITH SWEET AND SOUR CHICKEN?
For serving, you can either go ultra-traditional and stick with Asian cuisine or use any classic side. My favorite options include:
Plain white or brown rice
10 Minute Fried Rice
Garlic Parmesan Broccoli
Baked Onion Rings
Brown Sugar Glazed Carrots
10 Minute Asparagus
NOTES & TIPS FOR BAKED SWEET AND SOUR CHICKEN WINGS
Deep frying foods require a lot of oil, but that also begs the question: Once you’re done frying, what do you do with the oil? You can either safely dispose of it (see this article for instructions: How to Properly Dispose of Grease and Oil) or store it for future fried goods (see this article for tips: How to Deal with Leftover Frying Oil.)

BAKED SWEET AND SOUR CHICKEN Recipe 👇
Prep Time: 30 mins
Cook Time: 1hr
Calories: 1143 kcal
Yields: 4 servings
Skip the Chinese takeout and make baked sweet and sour chicken at home with a delicious sweet and sour sauce poured over tender chicken with a crispy breading.
Ingredients:
-
1 cup granulated sugar
-
1/4 cup ketchup
-
1/4 cup white vinegar
-
1/4 cup apple cider vinegar
-
1 tablespoon soy sauce
-
1/4 teaspoon garlic powder
-
1 cup canola oil, (or enough to cover the bottom of your skillet about 1/4 inch)
-
1 cup cornstarch
-
3 egg, beaten
-
3 chicken breast, (roughly 2lbs) cut into bite-sized pieces
-
1 pinch salt, to taste
-
1 pinch black pepper, to taste
-
1 tablespoon fresh chives, chopped (for garnish, optional)
Instructions:
-
Preheat oven to 325 F. Line a baking sheet with aluminum foil, making sure the sides are also covered (this will help with cleanup), and place nearby.
-
In a medium bowl, whisk together the sugar, ketchup, white vinegar, apple cider vinegar, soy sauce, and garlic powder until smooth.
-
Mixture may feel grainy – this is okay. Sugar will dissolve while you work on the next steps. Set sauce aside.
-
Place the beaten eggs in a shallow bowl nearby.
-
For the cornstarch, you can either put it in another shallow bowl OR add it to a Ziploc bag (gallon sized).
-
Finally, place a plate nearby and cover it with a paper towel.
-
Pour canola oil in a large skillet and warm over medium-high heat.
-
Coat bite-sized chicken pieces in cornstarch (by either dunking them in the bowl or adding them to the bag and shaking it) and then dip them in the egg.
-
Place coated chicken in the skillet and cook for 3-5 minutes or until the outsides of the chicken are golden brown and lightly crisp.
-
Transfer cooked chicken to the plate with the paper towel. TIP: I use a slotted spoon to dunk and coat the chicken in the egg. I then scoop them into the skillet, making sure to break apart the chicken once it’s in the oil so the pieces don’t stick together.
-
Once chicken pieces are cooked, whisk the sweet and sour sauce one more time and then toss the chicken in.
-
Use a spatula to gently turn and coat.
-
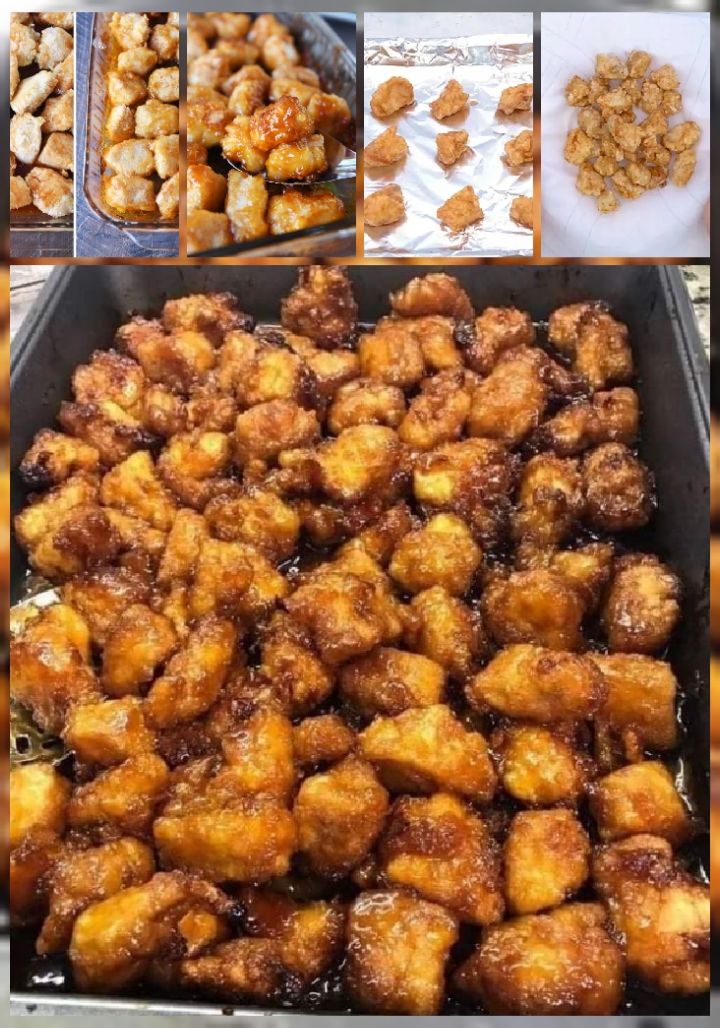
Pour the sweet and sour chicken (both chicken and excess sauce) on prepared baking sheet.
-
Spread chicken out in a single layer so that no pieces are touching.
-
Bake chicken for 15-30 minutes or until sweet and sour sauce seems baked into breading.
-
Serve immediately on a bed of rice with chives as garnish (optional).
